
This page contains all information about the material and requirements needed during the installation of a BRAMS receiving station.
The antenna
The antenna is a 3-element Yagi antenna, set up vertically and attached to a mast. The length of the antenna elements is of the order of 3 meters (half-wavelength). The lowest element (director) is attached at a height of around 2 meters to avoid that anyone can accidentally hit the antenna. The mast is usually inserted into a fixation system designed at our workshop. See pictures below to see examples. We provide the fixation system, the mast and the antenna. We add concrete blocks at the foot of the antennna to ensure stability of the system although the antenna wind's load is very low. It can also be fixed in addition using ropes when located on a high roof.
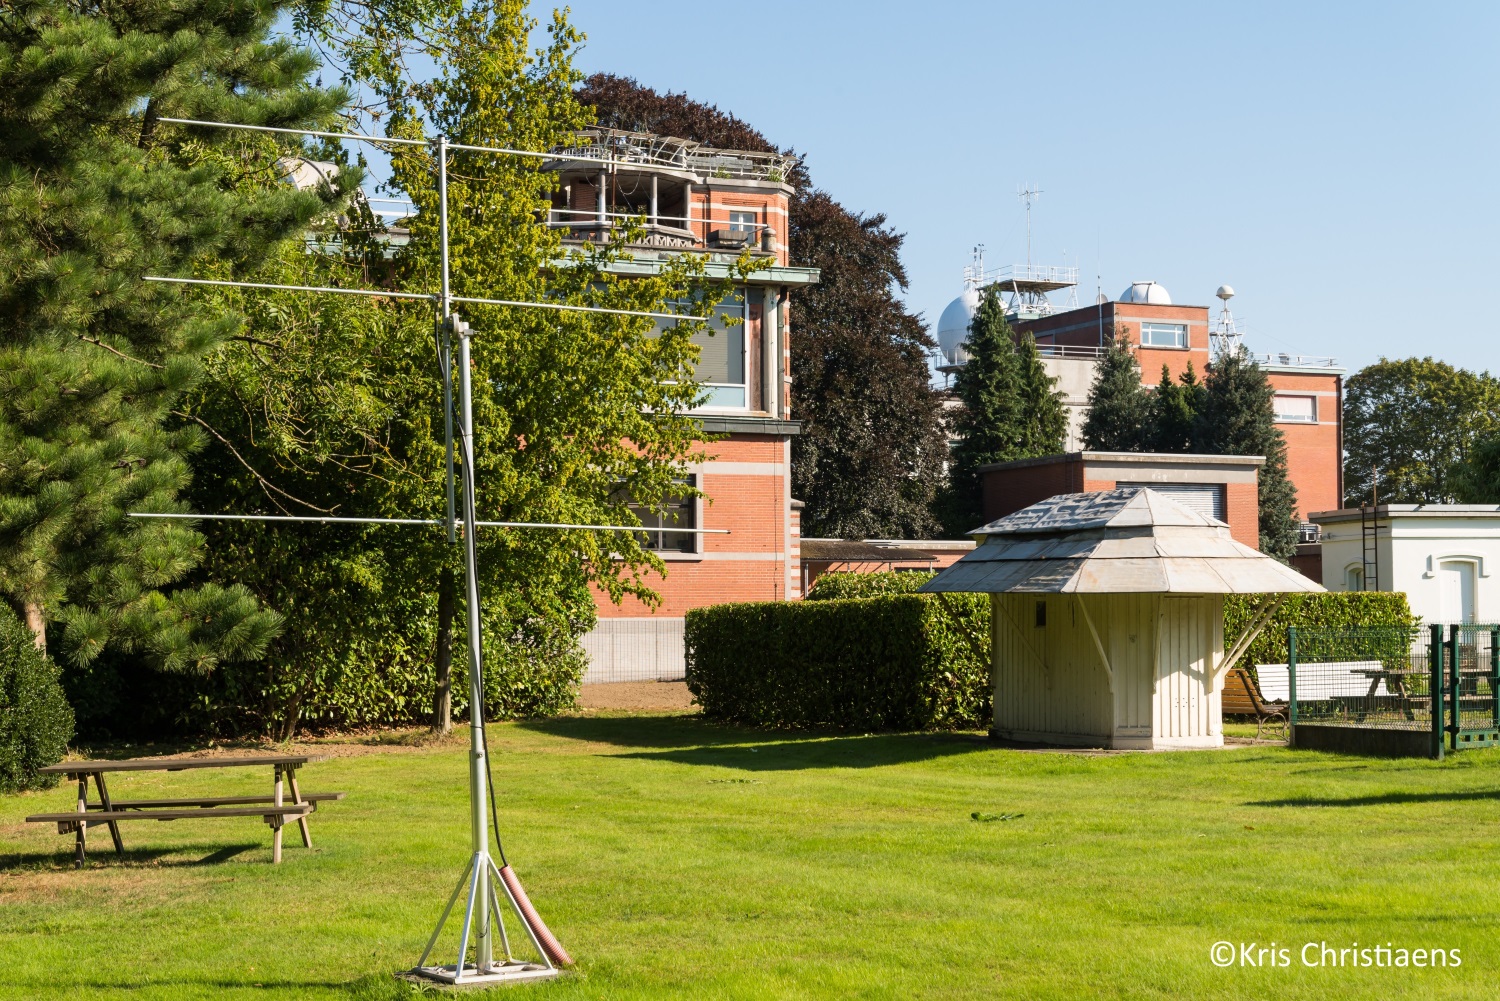
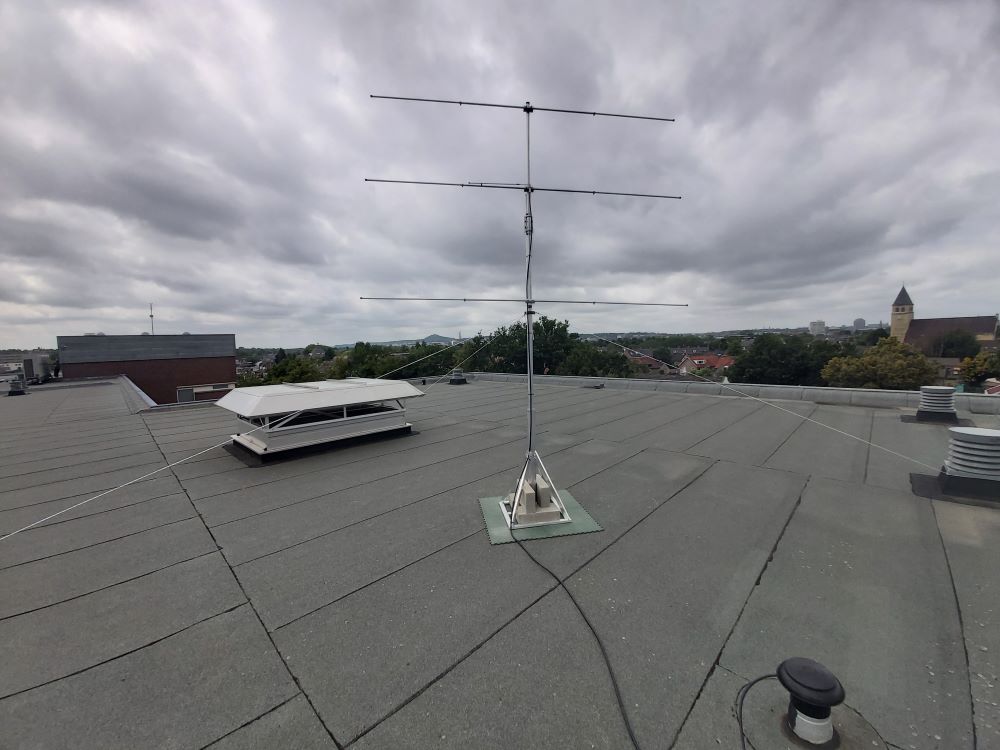
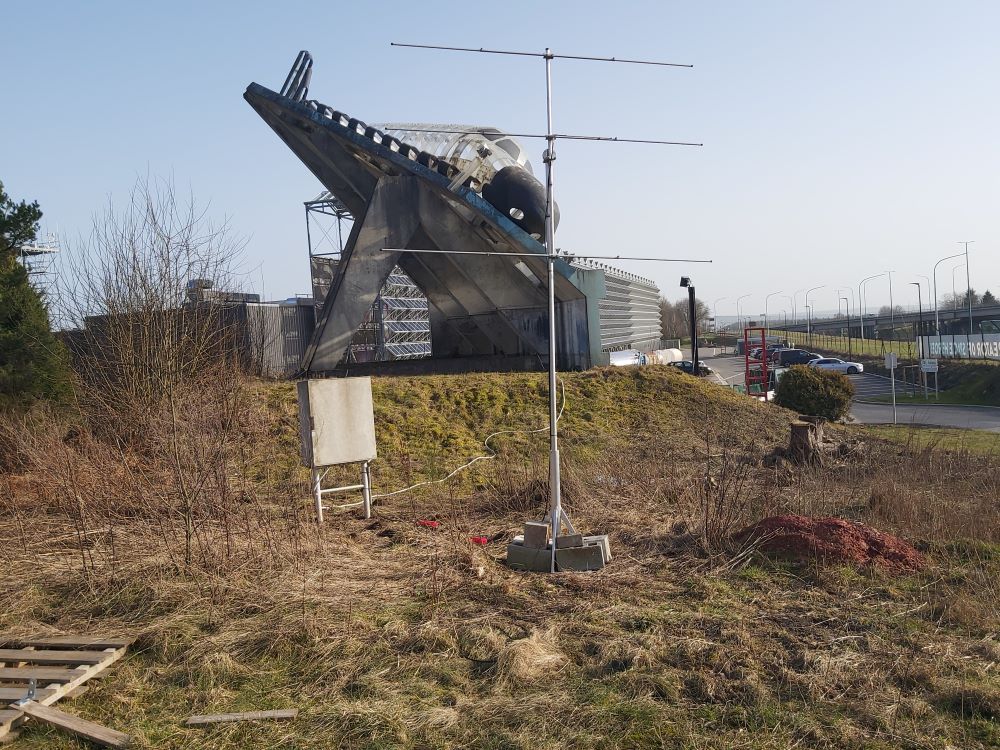
The antenna must be located outside, on a flat roof or on a flat place outside. This is the easiest for us to install the antenna. In some cases we can consider alternatives such as using an existing mast. In that case, the mast diameter must be measured accurately.
The antenna must be as far as possible from metallic pieces, if possible at least at a distance equal to the wavelength (6 meters). It must have a clear horizon in the direction of the transmitter.
The coaxial cable RG213
The RG213 cable goes from the matching part of the antenna to the receiving box located inside. It has low losses but experience has indicated that above 25 meters length, these losses start to become non-negligible. We therefore would like to avoid lengths greater than maximum 30 meters. When you estimate the needed length of the cable, add 3 meters for the cable to reach the connector of the antenna along the mast, and 1 m inside to form a loop near the box to follow the natural looping shape of the cable.
The RG213 cable is equipped with UHF connectors on both ends. The diameter of the cable is 1 cm and with the connector, we reach approximately 1.2 cm. The cable has to go from outside to inside and therefore a hole or a pipe in the wall has to be planned. A diameter of 1.5 cm for this hole allows to pass the RG213 cable and the two small cables from the GPS (see below) in a safe and easy way.
The cable can be buried in the ground if needed. In that case we can provide protection tubes
The two GPS
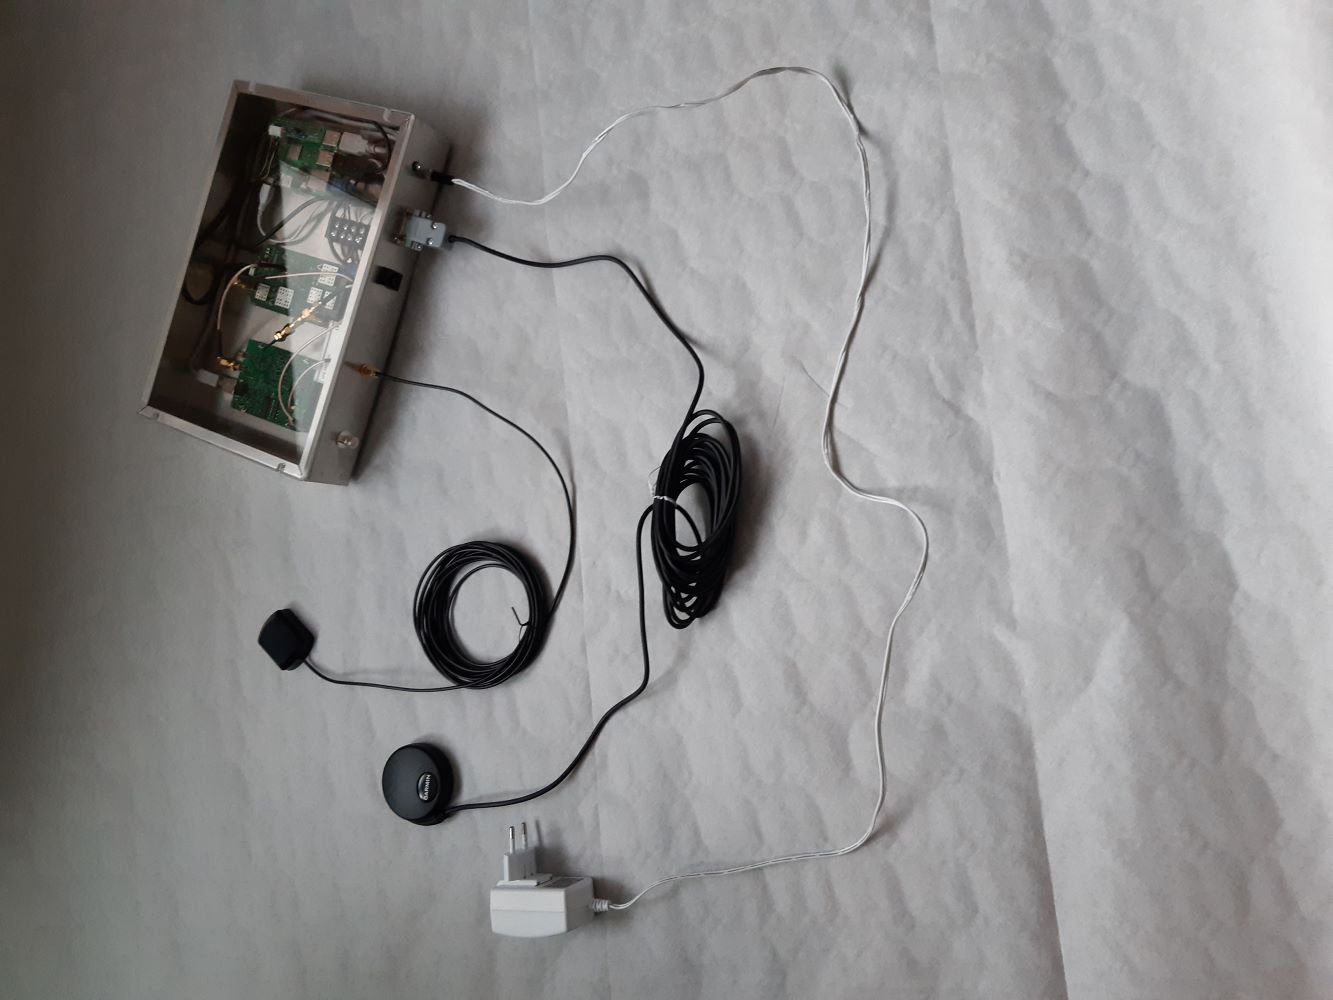
We use two GPS : a Garmin round black GPS to set timestamps to the data and allow a comparison between data recorded at multiple receiving stations, and a GPSDO (GPS Disciplined Oscillator) which is used to stabilize the frequency of the local oscillators of the RSP2 receiver and of the BRAMS calibrator.
Both GPS antennas are small and magnetic. They should in principle be located outside with a clear view on at least one hemisphere. Experience has proven that, even when located inside a building, but located near a large window with a clear view to the sky, they also detect enough satellites and work fine. This has to be tested on site.
The length of the small cables is of 5-6 meters for the GPDSO and about 10 meters for the Garmin GPS. This means that they cannot be located too far away from the receiving box, described below.
The two GPS can be seen in the picture below connected to the receiving box (described after)
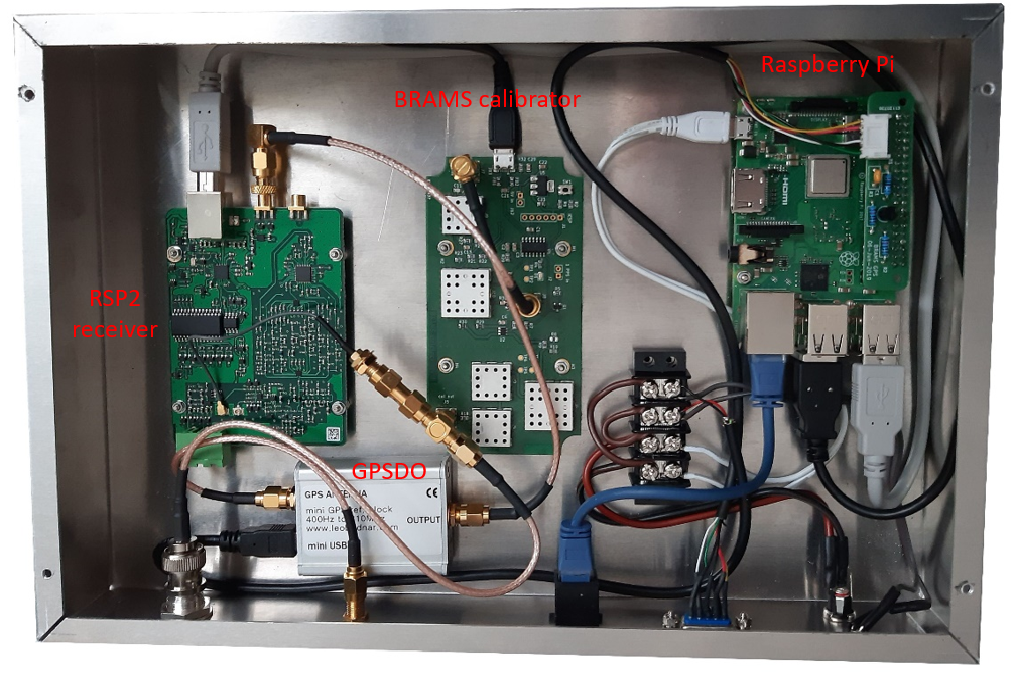
The receiving box
The box is metallic and has more or less an A4 size. It contains the Raspberry Pi, the RSP2 receiver, the GPSDO and the BRAMS calibrator. It needs 220 V to get powered and starts working immediately.
The box has 5 connectors : from left to right, a BNC/UHF adapter to plug the RG213 coaxial cable coming from the antenna, a SMA connector for the GPSDO, a RJ45 connector for Ethernet, a DB9 connector to connect the Garmin GPS, and a connector for the power.
The box must be preferentially located inside in a room with a stable temperature. The most crucial part is the DB9 connector which is fairly large. If the Garmin GPS is located outside, then this connector should pass through a hole or a pipe in the wall and care must be taken to not damage it. The shell of the connector can be dismantled to facilitate the passage through the wall.
Internet
We need an Internet connection for two reasons: first, the data are automatically transferred every hour to our servers at BIRA-IASB where they are archived regularly. 12 WAV files of size of approximately 3.5 MB are transferred every hour for a total of approximately 1 GB per day. With current Internet subscriptions, this is no longer an issue. Second, we need to be able to connect remotely to the RPi inside the receiving box to solve small problems, update algorithms, etc. For that we use ssh (Secure Shell). Once connected to Internet, the Raspberry Pi will automatically connect to a VPN service called Hamachi (https://vpn.net) and receive an IP address to which we can connect. If your Internet connection is down, a script will restart automatically this Hamachi service once the connection is back.
Power
The receiving box is powered by a 220V supply with a classical electrical plug (see picture above). The consumption is extremely small and no BRAMS station owner has ever seen his bill increase due to the constant use of the system. This is even more the case with this 2.0 system using the RSP2 receiver and the RPi. We cannot intervene in the payment of the electricity bill.
Live view of the data
In the first version of the BRAMS stations, we were using Spectrum Lab running on a PC to record and visualize live the data. With the new system, Spectrum Lab does not run anymore on the Raspberry Pi and is replaced by a C++ code to sample and record the data, and add timestamps. Nevertheless, there is a possibility to see the data live again running Spectrum Lab on any computer (Windows or Linux, for example using Wine) which is using the same local network as the one to which the Raspberry Pi is connected. The procedure is explained below. This is not mandatory. This is provided as a service for the people hosting the stations who want to check their data regularly or want to show it to the public (such as e.g. a public observatory).
To view the spectrogram on a computer you'll need Spectrum Lab installed. This is a freeware Windows application but it also works under Linux using wine. You can download and install Spectrum Lab (.zip). It is worth noting that the program is installed in C:\Spectrum\ by default. Spectrum Lab is a very complex software with many parameters and applications. In order to make the installation easier, we provide a Settings file (.txt) that you can download. Save it locally and rename it as SETTINGS.INI. Go in C:\Spectrum and delete all .INI files before saving this one there.
To view the signal using SpectrumLab, you'll need to tell it where to get the data from :
- in the FILE menu select Audio File & Stream analysis then Analyse and play stream /URL
- specify the URL : tcp://192.168.4.23:51234
- select Compressed Ogg/Vorbis as the stream format
- tick "keep this panel open" and "automatically reconnect"
- click on start
SpectrumLab should now start displaying a continuously scrolling spectrogram. Both brightness and contrast should be adjusted to make the signal visible. This is done using the sliders labelled B and C on the left of the window.
We do not provide the PC to visualize the data but any local PC should work.


